
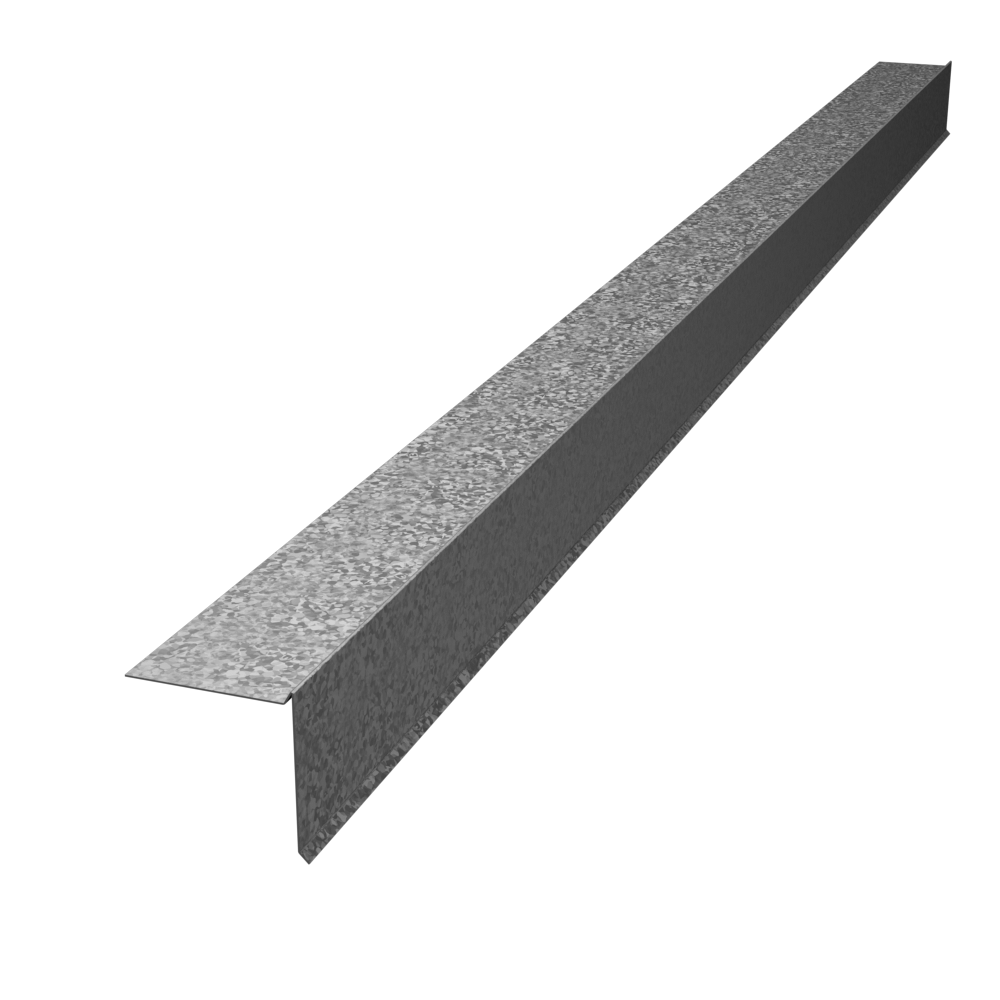
2-Way Edgings
Description
2-Way Edging is made of 28 or 26 Gauge Steel, 90° Angle, L-Metal/Grip/Drip Edge/Double Grip, 10′ long. Edge Flashing provides protection from water damage along the eaves and rake of a roof. The Material is Galvanized Steel (ASTM A-653) or Zincalume (Galvalume) (ASTM A-792), 26 or 28 Gauge, Mill Finish or Painted. For architectural, residential, and commercial roofing.
| Variant |
|---|
| Galvanized 2½” (1¼x½) Kick Out |
| Galvanized 2½” (1¼x½) Kick In |
| Galvanized 2½” (1¼x½) Double Grip |
| Galvanized 2½” (1¼x½) Metal |
| Galvanized 3″ (1½x¾) Kick Out |
| Galvanized 3″ (1½x¾) Kick In |
| Galvanized 3″ (1½x¾) Double Grip |
| Galvanized 3″ (1½x¾) Metal |
| Galvanized 3″ (2x½) Kick Out |
| Galvanized 3″ (2x½) Kick In |
| Galvanized 3″ (2x½) Double Grip |
| Galvanized 3″ (2x½) Metal |
| Galvanized 3½” (1½x½) Kick Out |
| Galvanized 3½” (1½x½) Double Grip |
| Galvanized 3½” (1½x½) Metal |
| Galvanized 4″ (2x¾) Kick Out |
| Galvanized 4″ (2x¾) Kick In |
| Galvanized 4″ (2x¾) Double Grip |
| Galvanized 4″ (2x¾) Metal |
| Galvanized 5″ (2½x¾) Kick Out |
| Galvanized 5″ (2½x¾) Kick In |
| Galvanized 5″ (2½x¾) Double Grip |
| Galvanized 5″ (2½x¾) Metal |
| Galvanized 6″ (3x¾) Kick Out |
| Galvanized 6″ (3x¾) Kick In |
| Galvanized 6″ (3x¾) Double Grip |
| Galvanized 6″ (3x¾) Metal |
| Galvanized 7″ (3½x¾) Kick Out |
| Galvanized 7″ (3½x¾) Kick In |
| Galvanized 7″ (3½x¾) Double Grip |
| Galvanized 7″ (3½x¾) Metal |
| Galvanized 8″ (4x¾) Kick Out |
| Galvanized 8″ (4x¾) Kick In |
| Galvanized 8″ (4x¾) Double Grip |
| Galvanized 8″ (4x¾) Metal |
| Galvanized 10″ (4½) Kick Out |
| Galvanized 10″ (4½) Kick In |
| Galvanized 10″ (4½) Double Grip |
| Galvanized 10″ (4½) Metal |
| Galvanized 12″ (6x¾) Kick Out |
| Galvanized 12″ (6x¾) Kick In |
| Galvanized 12″ (6x¾) Double Grip |
| Galvanized 12″ (6x¾) Metal |
| Zincalume 2½” (1¼x½) Kick Out |
| Zincalume 2½” (1¼x½) Kick In |
| Zincalume 2½” (1¼x½) Double Grip |
| Zincalume 3″ (1½x¾) Kick Out |
| Zincalume 3″ (1½x¾) Kick In |
| Zincalume 3″ (1½x¾) Double Grip |
| Zincalume 4″ (2x¾) Kick Out |
| Zincalume 4″ (2x¾) Kick In |
| Zincalume 4″ (2x¾) Double Grip |
| Zincalume 5″ (2½x¾) Kick Out |
| Zincalume 5″ (2½x¾) Kick In |
| Zincalume 5″ (2½x¾) Double Grip |
| Zincalume 6″ (3x¾) Kick Out |
| Zincalume 6″ (3x¾) Kick In |
| Zincalume 6″ (3x¾) Double Grip |
| Zincalume 8″ (4x¾) Kick Out |
| Zincalume 8″ (4x¾) Kick In |
| Zincalume 8″ (4x¾) Double Grip |
| Zincalume 10″ (4½) Kick Out |
| Zincalume 10″ (4½) Kick In |
| Zincalume 10″ (4½) Double Grip |
| Zincalume 12″ (6x¾) Kick Out |
| Zincalume 12″ (6x¾) Kick In |
| Zincalume 12″ (6x¾) Double Grip |
| Bondedized 2½” (1×1½) Kick-Out (Drip) |
| Bondedized 2½” (1×1½) Kick-In (Grip) |
| Bondedized 2½” (1×1½) Double Grip |
| Bondedized 2½” (1×1½) L-Metal |
| Bondedized 3″ (1½x1½) Kick-Out (Drip) |
| Bondedized 3″ (1½x1½) Kick-In (Grip) |
| Bondedized 3″ (1½x1½) Double Grip |
| Bondedized 3″ (1½x1½) L-Metal |
| Bondedized 3″ (1×2) Kick-Out (Drip) |
| Bondedized 3″ (1×2) Kick-In (Grip) |
| Bondedized 3″ (1×2) Double Grip |
| Bondedized 3″ (1×2) L-Metal |
| Bondedized 3½” (1½x2) Kick-Out (Drip) |
| Bondedized 3½” (1½x2) Kick-In (Grip) |
| Bondedized 3½” (1½x2) Double Grip |
| Bondedized 3½” (1½x2) L-Metal |
| Bondedized 4″ (2×2) Kick-Out (Drip) |
| Bondedized 4″ (2×2) Kick-In (Grip) |
| Bondedized 4″ (2×2) Double Grip |
| Bondedized 4″ (2×2) L-Metal |
| Bondedized 5″ (2×3) Kick-Out (Drip) |
| Bondedized 5″ (2×3) Kick-In (Grip) |
| Bondedized 5″ (2×3) Double Grip |
| Bondedized 5″ (2×3) L-Metal |
| Bondedized 6″ (3×3) Kick-Out (Drip) |
| Bondedized 6″ (3×3) Kick-In (Grip) |
| Bondedized 6″ (3×3) Double Grip |
| Bondedized 6″ (3×3) L-Metal |
| Bondedized 6″ (2×4) Kick-Out (Drip) |
| Bondedized 6″ (2×4) Kick-In (Grip) |
| Bondedized 6″ (2×4) Double Grip |
| Bondedized 6″ (2×4) L-Metal |
| Bondedized 8″ (4×4) Kick-Out (Drip) |
| Bondedized 8″ (4×4) Kick-In (Grip) |
| Bondedized 8″ (4×4) Double Grip |
| Bondedized 8″ (4×4) L-Metal |
| Bondedized 10″ (4×6) Kick-Out (Drip) |
| Bondedized 10″ (4×6) Kick-In (Grip) |
| Bondedized 10″ (4×6) Double Grip |
| Bondedized 10″ (4×6) L-Metal |
| Bondedized 12″ (6×6) Kick-Out (Drip) |
| Bondedized 12″ (6×6) Kick-In (Grip) |
| Bondedized 12″ (6×6) Double Grip |
| Bondedized 12″ (6×6) L-Metal |
| Charcoal 2½” (1×1½) Kick-Out (Drip) |
| Charcoal 2½” (1×1½) Kick-In (Grip) |
| Charcoal 2½” (1×1½) Double Grip |
| Charcoal 2½” (1×1½) L-Metal |
| Charcoal 3″ (1½x1½) Kick-Out (Drip) |
| Charcoal 3″ (1½x1½) Kick-In (Grip) |
| Charcoal 3″ (1½x1½) Double Grip |
| Charcoal 3″ (1½x1½) L-Metal |
| Charcoal 3″ (1×2) Kick-Out (Drip) |
| Charcoal 3″ (1×2) Kick-In (Grip) |
| Charcoal 3″ (1×2) Double Grip |
| Charcoal 3″ (1×2) L-Metal |
| Charcoal 3½” (1½x2) Kick-Out (Drip) |
| Charcoal 3½” (1½x2) Kick-In (Grip) |
| Charcoal 3½” (1½x2) Double Grip |
| Charcoal 3½” (1½x2) L-Metal |
| Charcoal 4″ (2×2) Kick-Out (Drip) |
| Charcoal 4″ (2×2) Kick-In (Grip) |
| Charcoal 4″ (2×2) Double Grip |
| Charcoal 4″ (2×2) L-Metal |
| Charcoal 5″ (2×3) Kick-Out (Drip) |
| Charcoal 5″ (2×3) Kick-In (Grip) |
| Charcoal 5″ (2×3) Double Grip |
| Charcoal 5″ (2×3) L-Metal |
| Charcoal 6″ (3×3) Kick-Out (Drip) |
| Charcoal 6″ (3×3) Kick-In (Grip) |
| Charcoal 6″ (3×3) Double Grip |
| Charcoal 6″ (3×3) L-Metal |
| Charcoal 6″ (2×4) Kick-Out (Drip) |
| Charcoal 6″ (2×4) Kick-In (Grip) |
| Charcoal 6″ (2×4) Double Grip |
| Charcoal 6″ (2×4) L-Metal |
| Charcoal 8″ (4×4) Kick-Out (Drip) |
| Charcoal 8″ (4×4) Kick-In (Grip) |
| Charcoal 8″ (4×4) Double Grip |
| Charcoal 8″ (4×4) L-Metal |
| Charcoal 10″ (4×6) Kick-Out (Drip) |
| Charcoal 10″ (4×6) Kick-In (Grip) |
| Charcoal 10″ (4×6) Double Grip |
| Charcoal 10″ (4×6) L-Metal |
| Charcoal 12″ (6×6) Kick-Out (Drip) |
| Charcoal 12″ (6×6) Kick-In (Grip) |
| Charcoal 12″ (6×6) Double Grip |
| Charcoal 12″ (6×6) L-Metal |
| White 2½” (1×1½) Kick-Out (Drip) |
| White 2½” (1×1½) Kick-In (Grip) |
| White 2½” (1×1½) Double Grip |
| White 2½” (1×1½) L-Metal |
| White 3″ (1½x1½) Kick-Out (Drip) |
| White 3″ (1½x1½) Kick-In (Grip) |
| White 3″ (1½x1½) Double Grip |
| White 3″ (1½x1½) L-Metal |
| White 3″ (1×2) Kick-Out (Drip) |
| White 3″ (1×2) Kick-In (Grip) |
| White 3″ (1×2) Double Grip |
| White 3″ (1×2) L-Metal |
| White 3½” (1½x2) Kick-Out (Drip) |
| White 3½” (1½x2) Kick-In (Grip) |
| White 3½” (1½x2) Double Grip |
| White 3½” (1½x2) L-Metal |
| White 4″ (2×2) Kick-Out (Drip) |
| White 4″ (2×2) Kick-In (Grip) |
| White 4″ (2×2) Double Grip |
| White 4″ (2×2) L-Metal |
| White 5″ (2×3) Kick-Out (Drip) |
| White 5″ (2×3) Kick-In (Grip) |
| White 5″ (2×3) Double Grip |
| White 5″ (2×3) L-Metal |
| White 6″ (3×3) Kick-Out (Drip) |
| White 6″ (3×3) Kick-In (Grip) |
| White 6″ (3×3) Double Grip |
| White 6″ (3×3) L-Metal |
| White 6″ (2×4) Kick-Out (Drip) |
| White 6″ (2×4) Kick-In (Grip) |
| White 6″ (2×4) Double Grip |
| White 6″ (2×4) L-Metal |
| White 8″ (4×4) Kick-Out (Drip) |
| White 8″ (4×4) Kick-In (Grip) |
| White 8″ (4×4) Double Grip |
| White 8″ (4×4) L-Metal |
| White 10″ (4×6) Kick-Out (Drip) |
| White 10″ (4×6) Kick-In (Grip) |
| White 10″ (4×6) Double Grip |
| White 10″ (4×6) L-Metal |
| White 12″ (6×6) Kick-Out (Drip) |
| White 12″ (6×6) Kick-In (Grip) |
| White 12″ (6×6) Double Grip |
| White 12″ (6×6) L-Metal |
| Terra Cotta 2½” (1×1½) Kick-Out (Drip) |
| Terra Cotta 2½” (1×1½) Kick-In (Grip) |
| Terra Cotta 2½” (1×1½) Double Grip |
| Terra Cotta 2½” (1×1½) L-Metal |
| Terra Cotta 3″ (1½x1½) Kick-Out (Drip) |
| Terra Cotta 3″ (1½x1½) Kick-In (Grip) |
| Terra Cotta 3″ (1½x1½) Double Grip |
| Terra Cotta 3″ (1½x1½) L-Metal |
| Terra Cotta 3″ (1×2) Kick-Out (Drip) |
| Terra Cotta 3″ (1×2) Kick-In (Grip) |
| Terra Cotta 3″ (1×2) Double Grip |
| Terra Cotta 3″ (1×2) L-Metal |
| Terra Cotta 3½” (1½x2) Kick-Out (Drip) |
| Terra Cotta 3½” (1½x2) Kick-In (Grip) |
| Terra Cotta 3½” (1½x2) Double Grip |
| Terra Cotta 3½” (1½x2) L-Metal |
| Terra Cotta 4″ (2×2) Kick-Out (Drip) |
| Terra Cotta 4″ (2×2) Kick-In (Grip) |
| Terra Cotta 4″ (2×2) Double Grip |
| Terra Cotta 4″ (2×2) L-Metal |
| Terra Cotta 5″ (2×3) Kick-Out (Drip) |
| Terra Cotta 5″ (2×3) Kick-In (Grip) |
| Terra Cotta 5″ (2×3) Double Grip |
| Terra Cotta 5″ (2×3) L-Metal |
| Terra Cotta 6″ (3×3) Kick-Out (Drip) |
| Terra Cotta 6″ (3×3) Kick-In (Grip) |
| Terra Cotta 6″ (3×3) Double Grip |
| Terra Cotta 6″ (3×3) L-Metal |
| Terra Cotta 6″ (2×4) Kick-Out (Drip) |
| Terra Cotta 6″ (2×4) Kick-In (Grip) |
| Terra Cotta 6″ (2×4) Double Grip |
| Terra Cotta 6″ (2×4) L-Metal |
| Terra Cotta 8″ (4×4) Kick-Out (Drip) |
| Terra Cotta 8″ (4×4) Kick-In (Grip) |
| Terra Cotta 8″ (4×4) Double Grip |
| Terra Cotta 8″ (4×4) L-Metal |
| Terra Cotta 10″ (4×6) Kick-Out (Drip) |
| Terra Cotta 10″ (4×6) Kick-In (Grip) |
| Terra Cotta 10″ (4×6) Double Grip |
| Terra Cotta 10″ (4×6) L-Metal |
| Terra Cotta 12″ (6×6) Kick-Out (Drip) |
| Terra Cotta 12″ (6×6) Kick-In (Grip) |
| Terra Cotta 12″ (6×6) Double Grip |
| Terra Cotta 12″ (6×6) L-Metal |
Frequently Asked Questions
What do 2-Way Edgings do at the eave and rake?
2-Way Edgings protect roof eaves and rakes from rain and debris while providing a formed metal edge for the roofing assembly.
Which metals do 2-Way Edgings come in?
2-Way Edgings can be produced from galvanized steel, Zincalume (Galvalume), prepainted steel, bonderized steel, stainless steel, copper, and aluminum.
Which gauges do 2-Way Edgings come in?
2-Way Edgings are most commonly available in 26-gauge and 28-gauge thicknesses.
What steel standards do 2-Way Edgings meet?
The applicable standards are ASTM A653 for galvanized steel, and ASTM A792 for Zincalume.
How do 2-Way Edgings shed water at the roof edge?
2-Way Edgings form a metal edge at eaves and rakes, helping water leave the roofing edge instead of tracking back onto the fascia or roof deck. They may have a straight drop, a drop with drip (kick out), or a drop with grip (kick in).
What is the difference between 2-Way Edgings and 3-Way Edgings?
A 2-Way Edging is a two-leg (horizontal and vertical) L- shape metal edge. A 3-Way Edging adds a third leg (return), so it is used where the edge detail needs an extra return, most commonly to go around the edge of fascia board.
Which of the metals offered for 2-Way Edgings should I choose?
Prepainted steel (available colors include brown, charcoal, gray, and white) is the general-purpose choice for 2-Way Edgings. Zincalume holds up well where salt air or constant damp is a factor due to the additional layer of organic coating. Bonderized steel can be soldered to create watertight corner connections and is the best option when the material needs to be painted on site. Copper is recommended for coastal areas.